
Steps 3: Installing all necessary Software stacks (LEMP stack)
Now it's batter to login with your newly created admin user in the last step rather continuing with root user, since this is our first interaction with the apt packaging system, run the following command to update our local package index so that we have access to the most recent package listings.
sudo apt-get update
A. Installing NGINX Web Server
Now we are up to date with our installer, Let's Install Nginx Server, run the following command in your terminal
sudo apt-get install nginx
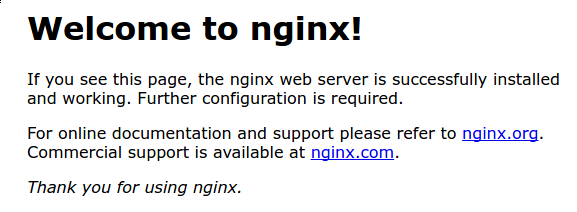
Now the installation process for our web server is complete, Simply type your server IP address in your browser and you will get a welcome message from nginx similar to the following.
B. Installing MySQL
It is must to have a Database to store information of our Laravel Application, you have various choices of Database server, my choice is MySQL database for this article. Let's Install MySQL on our Server.
sudo apt-get install mysql-server
once the installation process begin, it might prompt a bright pink/purple screen similar to the following in your terminal, and require you to enter a password for your database root user.
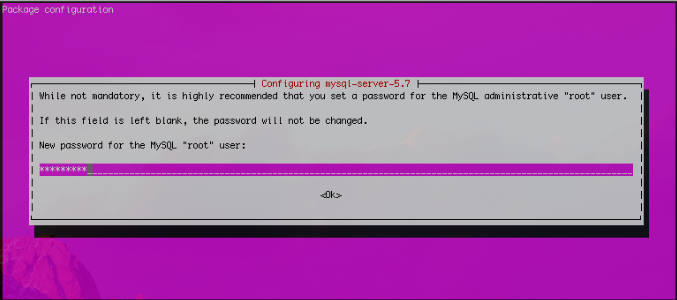
if it prompt, provide a secure password and confirm it, and note it some where safely, If you don't see this prompt, don't worry, you will still be able to setup your password later.
We are just completed the installation of my MySQL server, however still the server is with the default configuration which is not secure enough. MySQL provides us a nice helper script to get rid of a lot of unsecured settings and secure the server from those bad guys.
Please run the following command in your terminal
sudo mysql_secure_installation
it will take you through an step by step process to secure your installation.

1. Depending on the version it might ask you to install the VALIDATE PASSWORD plugin. I personally don’t think this is necessary since I want to have control over making new users and I will make sure the passwords are secure enough, so I will skip over this setting. (Type ‘N’) and proceed.
2. If you didn't see the bright pink/purple screen to setup the root password during the installation process before, you will be required to enter a root password in the Next step, if so please provide a strong password and confirm it and note it some where, If you have already provided a root mysql password during installation process above, it will just ask you whether you want to change the ROOT password, You may skip this by pressing any key other than "Y".
3. Next it will ask you whether you want to remove anonymous users. Type Y to remove the anonymous users since this a major security concern.
4. Then it will ask if you want to Disallow root login remotely? and you should also select Y for this.
5. Next another prompt will ask to Remove test database and access to it? This is a good idea to do, so type Y again for this.
6. Then It may also ask to reload privilege tables now? This is always a good idea, so type Y again.
Now The terminal will tell you All Done! With this announcement we now have a LEM stack, and still P is left in our progress of setting up LEMP stack.
C. Installing PHP
Although your server already has the necessary base PHP setup, we must install the plugin for PHP script processing which is called php-fpmand full version is called FastCGI Process Manager. We will also install php-mysql which will provide the necessary drivers to connect php with our mysql databases. One another important requirement of Laravel is to have the php-mbstring library. Let's install all of them by running the following command in your terminal.
sudo apt-get install php-fpm php-mysql php-mbstring
At the time of writing this article, PHP 7.2 is the latest version which will be installed as a result of above command. Now We have a complete installation of LEMP stack (Linux Engine-X or Nginx, MySQL and PHP).
At this point, If you want to run multiple PHP version for different laravel apps that will be hosted on the same droplet, then you can follow my other article on how to do that and then continue the rest of this article.
Install Multiple PHP Version with Nginx On a Same DigitalOcean Droplet for Laravel.
D. Configure PHP
With the complete Server Stack Installed, it is the time to configure everything to get it working. There is a slight changes to php.ini file due to the security concern.
Run the following command in your terminal to edit the php,ini file in nano editor, you can also use any other editor of your choice.
sudo nano /etc/php/7.2/fpm/php.ini
Once it is open, use Ctrl+W and now type in cgi.fix_pathinfo= and click enter, This will take you to the right line. You will see a semicolon the left of this line. Delete the semi colon and then change the 1 into a 0 and save the file.To save something in Nano, just press Ctrl+X and type Y and then press Enter.
You may also adjust the value in your php.ini file for configurations such asupload_max_filesize,post_max_size,max_execution_time,max_input_timeandmemory_limitaccording to your project requirement.
To see the changes take effect we need to restart php-fpm by typing following command in your terminal.
sudo systemctl restart php7.2-fpm
E. Configure Nginx
With most of the configuration completed, it is time to setup the server engine and define how we will access our project, whether using an IP address or Domain name. All the configuration we have to make is in in the Server Block File, let's edit the default server block file with the following command.
sudo nano /etc/nginx/sites-available/default
Carefully scroll down to the section which define index names, In the line with all of the index names, we will add index.php to the list of allowed file types to deliver by default. What this line tells Nginx is to first look for an index file, then look for an index.php file, then an index.html file and so forth and send the matching file to the user. Nginx process the Index from top to bottom in the line, so the order is very important here, Index.php file must be processed prior to index.html file.
server {
    listen 80 default_server;
    listen [::]:80 default_server;

    root /var/www/html;
    index index.php index.html index.htm index.nginx-debian.html;

    server_name _;
}
Next thing we will define a server name, for this you can either write your droplet IP address or a domain name, depending on how you or your user want to access your site.
if you want to access your website using domain name:
You must have a registered domain name already and that is pointing to digital ocean server and you have added appropriate A records in your control panel. If not please follow this tutorials to know how to point the domain name to digital ocean droplet.
- Add Domain Names in Digital Ocean Dashboard
- Create A record in Digitalocean Control Panel
- Point the Digital Ocean nameservers with Popular Domain Registrars
now with the domain is ready, we will define our domain name in the server block files in the line which define server_name _; , as in the example bellow.
server {
    listen 80 default_server;
    listen [::]:80 default_server;

    root /var/www/html;
    index index.php index.html index.htm index.nginx-debian.html;

    server_name yourdomainname.com www.yourdomainname.com;

    location / {
        try_files $uri $uri/ =404;
    }
}
if you want to access your website using IP Address:
simple copy past your droplet IP address in the server_name line as in the example bellow.For demonstration i am using a sample IP address as 100.100.100.100, you must replace it with your actual IP address.
server {
    listen 80 default_server;
    listen [::]:80 default_server;

    root /var/www/html;
    index index.php index.html index.htm index.nginx-debian.html;

    server_name 100.100.100.100;

    location / {
        try_files $uri $uri/ =404;
    }
}
Next define the path for your Laravel Project folder where it resides on the server. You have to add the path in the line that follows root in the server block file.
I know we don't have a project folder yet on the server, however we will just define one for now and use the same project folder name in the next step of our deployment process. I will use techalyst as project name for demonstration purpose and you must use your project name.
server {
    listen 80 default_server;
    listen [::]:80 default_server;

    root /var/www/techalyst/public;
    index index.php index.html index.htm index.nginx-debian.html;

    server_name techalyst.com www.techalyst.com;

    location / {
        try_files $uri $uri/ =404;
    }
}
Please note that our project root path is pointing to public folder followed by our project name, because the index.php file that reside in public folder is the entry point for all requests entering your application and configures auto-loading.
The index.php file is also responsible for handling all the query parameters and passing it to laravel. So we need to do an adjustment to the very first location block in the server block file as bellow:
server {
    listen 80 default_server;
    listen [::]:80 default_server;

    root /var/www/techalyst/public;
    index index.php index.html index.htm;

    server_name techalyst.com www.techalyst.com;

    # do the changes bellow, this is the first location block.
    location / {
        try_files $uri $uri/ /index.php?$query_string;
    }

    # more location blocks continue below
    # (no changes needed beyond this point)
}
Next we need to do the following adjustment to the second and third location blocks, by removing the comments in the second location block, we tell the Nginx to use the php-fpm that we installed earlier. Please make sure to rewrite appropriate PHP version matching to your server, at the time of writing this article, it was php version 7.2 in my server.
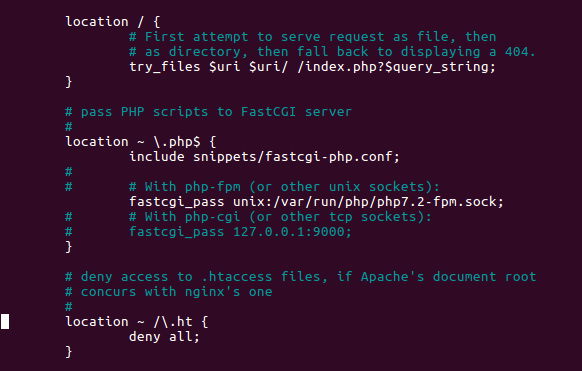
If you see carefully the above picture, you should note that I have also removed the comments in the third location block, so I ask Nginx to ignore the .htaccess files which is related to Apache Server and not Nginx Server.
finally with every changes in place, your server block files must be similar to the following:
server {
    listen 80 default_server;
    listen [::]:80 default_server;

    root /var/www/techalyst/public;
    index index.php index.html index.htm index.nginx-debian.html;

    server_name techalyst.com www.techalyst.com;

    location / {
        try_files $uri $uri/ /index.php?$query_string;
    }

    location ~ \.php$ {
        include snippets/fastcgi-php.conf;
        fastcgi_pass unix:/var/run/php/php7.2-fpm.sock;
    }

    location ~ /\.ht {
        deny all;
    }
}
That is all for now and we have completed the configuration with Nginx, Let's save the file and reload the new configuration. To save it remember to press Ctrl + X and then type Y and then press enter.
Now that we have saved the file, make sure it is error free by typing:
sudo nginx -t
If everything was correct then you should get this notice in your terminal:
nginx: the configuration file /etc/nginx/nginx.conf syntax is ok
nginx: configuration file /etc/nginx/nginx.conf test is successful
This means you have no errors. Let's restart Nginx Server so that our changes can take affect.
sudo systemctl reload nginx
with this setup, now your server is ready to host the Laravel Project. Let's go ahead and deploy the Project from your development machine. Click here to Continue with deployment process.


Be the first one to write a response :(
{{ reply.member.name }} - {{ reply.created_at_human_readable }}