Laravel Mix provides a fluent API for defining Webpack build steps for your application using several common CSS and JavaScript pre-processors.
That is the definition taken straight from the documentation. But what does it all mean?
The lovely creators of Laravel Mix, put in the common webpack configurations and you can add more custom configurations if you wish.
This is especially wonderful for people that want to use webpack, but feel like configuring webpack is too difficult. Or maybe they wanted to use ES2016 but saw some complicated article about loaders and modules.
Laravel Mix allows you to use a single line to describe what you want and it'll use it's preconfigured settings to process it properly.
Installing Laravel Mix
With Laravel
If you're using Laravel 5.4 and above, then mix is already installed. All you have to do is run npm install.
Standalone
From the root of your application, run the following commands
npm init -y
npm install laravel-mix --save-dev
cp -r node_modules/laravel-mix/setup/webpack.mix.js ./
Now in the package.json file, add this.
    "scripts": {
        "dev": "NODE_ENV=development webpack --progress --hide-modules --config=node_modules/laravel-mix/setup/webpack.config.js",
        "watch": "NODE_ENV=development webpack --watch --progress --hide-modules --config=node_modules/laravel-mix/setup/webpack.config.js",
        "hot": "NODE_ENV=development webpack-dev-server --inline --hot --config=node_modules/laravel-mix/setup/webpack.config.js",
        "production": "NODE_ENV=production webpack --progress --hide-modules --config=node_modules/laravel-mix/setup/webpack.config.js"
    }
Now the installation is complete.
Configuring Laravel Mix
Most of our time will be spent in the webpack.mix.js file. In the file, you should see this.
let mix = require('laravel-mix');

    /*
     |--------------------------------------------------------------------------
     | Mix Asset Management
     |--------------------------------------------------------------------------
     |
     | Mix provides a clean, fluent API for defining some Webpack build steps
     | for your Laravel application. By default, we are compiling the Sass
     | file for your application, as well as bundling up your JS files.
     |
     */

    mix.js('src/app.js', 'dist/')
       .sass('src/app.scss', 'dist/');
It is already preconfigured to compile a file at src/app.js to dist/app.js file and src/app.scss to dist/app.css.
There are several more Mix methods and you can see all of them in the default webpack.mix.js file.
    // Full API
    // mix.js(src, output);
    // mix.react(src, output); <-- Identical to mix.js(), but registers React Babel compilation.
    // mix.extract(vendorLibs);
    // mix.sass(src, output);
    // mix.standaloneSass('src', output); <-- Faster, but isolated from Webpack.
    // mix.fastSass('src', output); <-- Alias for mix.standaloneSass().
    // mix.less(src, output);
    // mix.stylus(src, output);
    // mix.postCss(src, output, [require('postcss-some-plugin')()]);
    // mix.browserSync('my-site.dev');
    // mix.combine(files, destination);
    // mix.babel(files, destination); <-- Identical to mix.combine(), but also includes Babel compilation.
    // mix.copy(from, to);
    // mix.copyDirectory(fromDir, toDir);
    // mix.minify(file);
    // mix.sourceMaps(); // Enable sourcemaps
    // mix.version(); // Enable versioning.
    // mix.disableNotifications();
    // mix.setPublicPath('path/to/public');
    // mix.setResourceRoot('prefix/for/resource/locators');
    // mix.autoload({}); <-- Will be passed to Webpack's ProvidePlugin.
    // mix.webpackConfig({}); <-- Override webpack.config.js, without editing the file directly.
    // mix.then(function () {}) <-- Will be triggered each time Webpack finishes building.
    // mix.options({
    //   extractVueStyles: false, // Extract .vue component styling to file, rather than inline.
    //   processCssUrls: true, // Process/optimize relative stylesheet url()'s. Set to false, if you don't want them touched.
    //   purifyCss: false, // Remove unused CSS selectors.
    //   uglify: {}, // Uglify-specific options. https://webpack.github.io/docs/list-of-plugins.html#uglifyjsplugin
    //   postCss: [] // Post-CSS options: https://github.com/postcss/postcss/blob/master/docs/plugins.md
    // });
The beauty of this is that we can chain as many of these as we want and not worry about the underlying webpack build.
Supports SASS, LESS, Stylus, PostCSS, PlainCss and much more. And all you have to write is a single line.
Compiling
After configuring your app, there are several commands we can run.
npm run dev
This builds our assets but does not minify or produce a production-ready build.

npm run watch
Similar to npm run dev but will watch for changes to our assets and automatically re-compile any changed asset
npm run hot
Will not just refresh the page when a piece of JavaScript is changed, but it will also maintain the current state of the component in the browser.
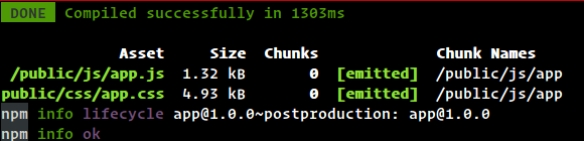
npm run production
Will compile all our assets and produce a production-ready build. It will run all Mix tasks, and it will minify the output.
Basic Demo
Let's create a simple HTML "fictional" interface with some little CSS and JS. We want our folder structure to be something like this:
 app/
    |__public/ #webroot
    |    |__js/  #folder for JS files
    |    |__css/  #folder for CSS files
    |    |__media/  #folder for images and other files
    |
    |__resorces/
    |    |__scripts/ #folder for our source JS files
    |    |__styles/ #folder for our source SASS files
    |
    |__src/ #folder we want copied "as is" to the public directory.
    |
    package.json
    webpack.mix.js
So our webpack.mix.js file looks like this.
    let mix = require('laravel-mix');
    mix .js('resources/scripts/app.js', 'public/js/app.js')
       .sass('resources/styles/app.scss', 'public/css/app.css')
       .copyDirectory('src', 'public');
In the above example, we have a public directory which serves as our root. We also have an index.html file which will be the app's homepage.
We want to keep all our CSS files in public/css folder. For now, there is just one file there, the app.css file. Since we are using SASS, we will use Laravel Mix's sass() method to compile the app.scss file to app.css. We will do the same to compile our resources/scripts/app.js to public/js/app.js.
A More Advanced Example
For another project, we will build several static sites with the same codebase. But the source files compile to different directories. The desired folder structure is like this.
app/
    |__public/ #webroot
    |    |__site1/
    |    |    |__js/  #folder for JS files
    |    |    |__css/  #folder for CSS files
    |    |    |__media/  #folder for images and other files
    |    |    |__index.html
    |    |
    |    |__site2/
    |         |__js/  #folder for JS files
    |         |__css/  #folder for CSS files
    |         |__media/  #folder for images and other files
    |    |    |__index.html
    |
    |__site1/
    |   |__scripts/ #folder for our source JS files
    |   |__styles/ #folder for our source SASS files
    |   |__src/ #folder we want copied "as is" to the webroot
    |        |__media/ #folder for images and other files
    |        |__index.html
    |
    |__site2/
    |   |__scripts/ #folder for our source JS files
    |   |__styles/ #folder for our source SASS files
    |   |__src/ #folder we want copied "as is" to the webroot
    |        |__media/ #folder for images and other files
    |        |__index.html
    |
    |__package.json
    |__webpack.mix.js
So we will configure our webpack.mix.js this way.
    let mix = require('laravel-mix');
    mix .js('site1/scripts/app.js', 'public/site1/js/app.js')
    .sass('site1/styles/app.scss', 'public/site1/css/app.css')
    .copyDirectory('site1/src', 'public/site1')
    .js('site2/scripts/app.js', 'public/site2/js/app.js')
    .sass('site2/styles/app.scss', 'public/site2/css/app.css')
    .copyDirectory('site2/src', 'public/site2');
Since both of the sites are similar and have the same dependencies, then instead of having a separate setup for each of them, we can Laravel Mix to compile them to different folders which we can then set as separate web roots for their respective sites.
Using this method prevents us from having two separate projects and having to install and maintain the same set of dependencies in both of them.
The structure is very similar to the first demo, but since Laravel Mix allows us to set the compile destination, we can easily compile to different folders which we will then use as the webroot.
We will put all the souce code for site1 in the folder app/site1/, and site2 in app/site2/. Inside these folders, we will have the scripts/ folder for the JavaScript files, and the styles/ folder for the SASS files. The src folder is for the files that we simply want copied to the webroot.
The webroot for the sites will be at public/site1/ and public/site2/ respectively.
Advanced Webpack
Laravel Mix actually has a preconfigured webpack.config.js file that it references when it runs. If you need to add some custom config, you can pass your additional webpack configuration to the mix.webpackConfig() method.
To completely customize your Webpack configuration, copy the node_modules/laravel-mix/setup/webpack.config.js file to your application's root directory. Then edit your package.json file, and point all of the --config references to the newly copied configuration file.
For example.
    "scripts": {
        "dev": "NODE_ENV=development webpack --progress --hide-modules --config=webpack.config.js",
        "watch": "NODE_ENV=development webpack --watch --progress --hide-modules --config=webpack.config.js",
        "hot": "NODE_ENV=development webpack-dev-server --inline --hot --config=webpack.config.js",
        "production": "NODE_ENV=production webpack --progress --hide-modules --config=webpack.config.js"
    }
Conclusion
As you can see in the demos, Laravel Mix saves a lot of time. There is no more need to worry about webpack configurations. If you have not used webpack before, this is a great entry tool. However, if you have used it before, this helps to simplify the entire process.


Be the first one to write a response :(
{{ reply.member.name }} - {{ reply.created_at_human_readable }}