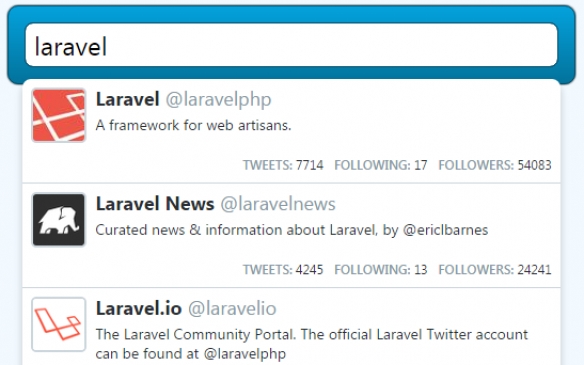
In a big web application, like an online market or a social network, one of the most important parts of the app is the search functionality. Having a great search feature will help your users find the right content(users, products, articles) quickly and easily.
You may find a sample such search feature in Techalyst.com Home Page.

In this tutorial, we are going to learn, how to enhance your default search field in your site with real-time suggestions from the database. We will be using Laravel, jQuery and Typeahead(Bloodhound as the suggestion engine) to implement the smart search and Bootstrap for the styling. So, let's get started.
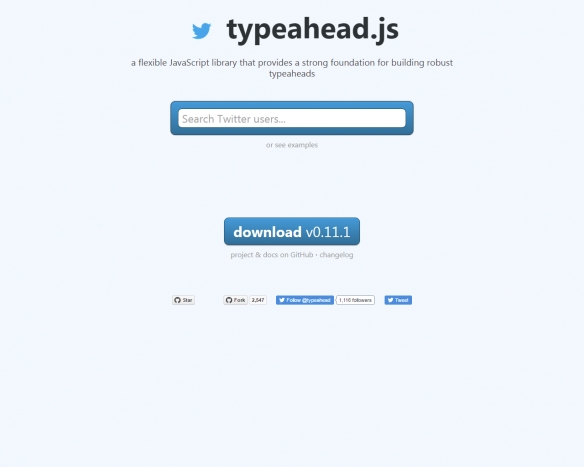
Typeahead.js

Typeahead.js is a flexible JavaScript library that provides a strong foundation for building robust search auto-completion. It's library consists of two components:
- Typeahead - The UI view
- Bloodhound - The suggestion engine
The suggestion engine computes the suggestions for a given query and the UI view renders them. Both can be used separately. In this tutorial, we are going to use both of them.
You may find a sample such search feature in Techalyst.com Home Page.
Getting Started
To get started, you need to pull in Typeahead.js. You can use any of the following methods to install Typeahead.
- Preferred method:
- Install with Bower:
$ bower install typeahead.js
- Install with Bower:
- Other methods:
- Download zip ball of the latest release.
- Download the latest dist files individually:
- bloodhound.js (standalone suggestion engine)
- typeahead.jquery.js (standalone UI view)
- typeahead.bundle.js (bloodhound.js + typeahead.jquery.js)
- typeahead.bundle.min.js
- Using CDN
Note: Both bloodhound.js and typeahead.jquery.js have a dependency on jQuery 1.9+.
We are going to use the CDN option to do this. We need a simple input element to let Typeahead show it's magic on. Our HTML file will look like this:
<!DOCTYPE html>
<html lang="en">
  <head>
    <meta charset="utf-8">
    <meta http-equiv="X-UA-Compatible" content="IE=edge">
    <meta name="viewport" content="width=device-width, initial-scale=1">
    <title>Laravel and Typeahead Tutorial</title>

    <!-- Bootstrap -->
    <link rel="stylesheet" href="https://maxcdn.bootstrapcdn.com/bootstrap/3.3.6/css/bootstrap.min.css">

    <!-- HTML5 shim and Respond.js for IE8 support of HTML5 elements and media queries -->
    <!-- WARNING: Respond.js doesn't work if you view the page via file:// -->
    <!--[if lt IE 9]>
      <script src="https://oss.maxcdn.com/html5shiv/3.7.2/html5shiv.min.js"></script>
      <script src="https://oss.maxcdn.com/respond/1.4.2/respond.min.js"></script>
    <![endif]-->
  </head>
  <body>
    <h1>Laravel and Typeahead Tutorial</h1>
    <hr>
    <form class="typeahead" role="search">
      <div class="form-group">
        <input type="search" name="q" class="form-control" placeholder="Search" autocomplete="off">
      </div>
    </form>
    <!-- jQuery (necessary for Bootstrap's JavaScript plugins and Typeahead) -->
    <script src="https://ajax.googleapis.com/ajax/libs/jquery/1.11.3/jquery.min.js"></script>
    <!-- Bootstrap JS -->
    <script src="https://maxcdn.bootstrapcdn.com/bootstrap/3.3.6/js/bootstrap.min.js"></script>
    <!-- Typeahead.js Bundle -->
    <script src="https://cdnjs.cloudflare.com/ajax/libs/typeahead.js/0.11.1/typeahead.bundle.min.js"></script>
  </body>
</html>
Initialization
To initialize Typeahead on any input field use:
$(".search-input").typeahead(options, [*datasets])\Tip: Set autocomplete="off" for the input box if you want to prevent default browser menus from appearing.
Options
When initializing a typeahead, there are a number of options you can configure. Some of them are:
- highlight – If true, when suggestions are rendered, pattern matches for the current query in text nodes will be wrapped in a strong element with its class set to {{classNames.highlight}}. Defaults to false.
- hint – If false, the typeahead will not show a hint. Defaults to true.
- minLength – The minimum character length needed before suggestions start getting rendered. Defaults to 1.
You can view them all https://github.com/twitter/typeahead.js/blob/master/doc/jquery_typeahead.md#options.
Our options look like this:
$("#navbar-search-input").typeahead({
    hint: true,
    highlight: true,
    minLength: 1
});
Datasets
A typeahead can have many datasets. Take the example of the Facebook search. When you type something, it returns many suggestions in groups like users, groups, pages, games, etc. Here we will be only returning our users as the dataset from the server.
Datasets can be configured using many options. Some of them are following:
- name – The name of the dataset. This will be appended to {{classNames.dataset}}- to form the class name of the containing DOM element. Must only consist of underscores, dashes, letters (a-z), and numbers. Defaults to a random number.
- source – The backing data source for suggestions. Expected to be a function with the signature (query, syncResults, asyncResults). syncResults should be called with suggestions computed synchronously and asyncResults should be called with suggestions computed asynchronously (e.g. suggestions that come for an AJAX request). source can also be a Bloodhound instance. Required.
- limit – The max number of suggestions to be displayed. Defaults to 5.
View them all https://github.com/twitter/typeahead.js/blob/master/doc/jquery_typeahead.md#datasets
Bloodhound
For the source, we will fetch the data from the server, To do so, we will use Bloodhound. It is typeahead.js suggestion engine. It offers a many advanced functionalities including caching and fetching remote data.
// Set the Options for "Bloodhound" suggestion engine
var engine = new Bloodhound({
    remote: {
        url: '/find?q=%QUERY%',
        wildcard: '%QUERY%'
    },
    datumTokenizer: Bloodhound.tokenizers.whitespace('q'),
    queryTokenizer: Bloodhound.tokenizers.whitespace
});
We have not setup the route yet as we have specified in the value of url, but we will do that later. datumTokenizer needs an array of JSON, which, in this example is 'q'.
Now that, we have the data, we can use it as the source value of typeahead like:
source: engine.ttAdapter()
Templates
Typeahead allows the use of templates to modify the styling of the suggestions. As we have pulled in Bootstrap, we can use the list-group classes for the styling.
templates: {
    empty: [
        '<div class="list-group search-results-dropdown"><div class="list-group-item">Nothing found.</div></div>'
    ],
    header: [
        '<div class="list-group search-results-dropdown">'
    ],
    suggestion: function (data) {
         return '<a href="' + data.profile.username + '" class="list-group-item">' + data.name + ' - @' + data.profile.username + '</a>'
    }
}
After all, your code should look like this:
jQuery(document).ready(function($) {
    // Set the Options for "Bloodhound" suggestion engine
    var engine = new Bloodhound({
        remote: {
            url: '/find?q=%QUERY%',
            wildcard: '%QUERY%'
        },
        datumTokenizer: Bloodhound.tokenizers.whitespace('q'),
        queryTokenizer: Bloodhound.tokenizers.whitespace
    });

    $(".search-input").typeahead({
        hint: true,
        highlight: true,
        minLength: 1
    }, {
        source: engine.ttAdapter(),

        // This will be appended to "tt-dataset-" to form the class name of the suggestion menu.
        name: 'usersList',

        // the key from the array we want to display (name,id,email,etc...)
        templates: {
            empty: [
                '<div class="list-group search-results-dropdown"><div class="list-group-item">Nothing found.</div></div>'
            ],
            header: [
                '<div class="list-group search-results-dropdown">'
            ],
            suggestion: function (data) {
                return '<a href="' + data.profile.username + '" class="list-group-item">' + data.name + '- @' + data.profile.username + '</a>'
      }
        }
    });
});
Laravel
To get started on the backend side, install a new Laravel applicaiton using Composer.
composer create-project --prefer-dist laravel/laravel app-name
You can do any other configuration you need.
The search function
For the search function, we will be using Searchable. This package provides a trait that adds a simple search function to Eloquent Models. Searchable allows you to perform searches in a table giving priorities to each field for the table and its relations.
Go ahead and install it by running this command:
composer require "nicolaslopezj/searchable:1.*"
Add the trait to the model, you want the search function to be available on You also need to specify the search rules(the columns you want to run the search on) via the $searchable property.
<?php

namespace App;

use App\Profile;
use Nicolaslopezj\Searchable\SearchableTrait;
use Illuminate\Foundation\Auth\User as Authenticatable;

class User extends Authenticatable
{
    use SearchableTrait;

    protected $searchable = [
        'columns' => [
            'users.name' => 10,
            'profiles.username' => 5,
            'profiles.bio' => 3,
            'profiles.country' => 2,
            'profiles.city' => 1,
        ],
        'joins' => [
            'profiles' => ['users.id','profiles.user_id'],
        ],
    ];

    public function profile()
    {
        return $this->hasOne(Profile::class);
    }
}
Now, you can search the User model with the search function like this:
// Simple search
$users = User::search($query)->get();

// Search and get relations
// It will not get the relations if you don't do this
$users = User::search($query)
            ->with('profile')
            ->get();
Routes
We will have one route for returning JSON output to the Bloodhound query. Add this route to your routes.php file.
Route::get('find', 'SearchController@find');Controller
As mentioned in the route, we will need controller calledSearchController with a method 'query' on it. Run this command to make this controller:
php artisan make:controller SearchController
After that, add this method to the controller:
public function find(Request $request)
{
    return User::search($request->get('q'))->with('profile')->get();
}
As we simply return the data back, by default Laravel casts that to JSON.
Connecting Everything
We know that by default Laravel includes a route and a view for displaying the hompage of your site.
Route::get('/', function () {
    return view('welcome');
});
To connect everything, we can just modify that view to include what we have built above. Your final view should look like this:
<!DOCTYPE html>
<html lang="en">
  <head>
    <meta charset="utf-8">
    <meta http-equiv="X-UA-Compatible" content="IE=edge">
    <meta name="viewport" content="width=device-width, initial-scale=1">
    <title>Laravel and Typeahead Tutorial</title>

    <!-- Bootstrap -->
    <link rel="stylesheet" href="https://maxcdn.bootstrapcdn.com/bootstrap/3.3.6/css/bootstrap.min.css">

    <!-- HTML5 shim and Respond.js for IE8 support of HTML5 elements and media queries -->
    <!-- WARNING: Respond.js doesn't work if you view the page via file:// -->
    <!--[if lt IE 9]>
      <script src="https://oss.maxcdn.com/html5shiv/3.7.2/html5shiv.min.js"></script>
      <script src="https://oss.maxcdn.com/respond/1.4.2/respond.min.js"></script>
    <![endif]-->
  </head>
  <body>
    <h1>Laravel and Typeahead Tutorial</h1>
    <hr>
    <form class="typeahead" role="search">
      <div class="form-group">
        <input type="search" name="q" class="form-control search-input" placeholder="Search" autocomplete="off">
      </div>
    </form>
    <!-- jQuery (necessary for Bootstrap's JavaScript plugins  and Typeahead) -->
    <script src="https://ajax.googleapis.com/ajax/libs/jquery/1.11.3/jquery.min.js"></script>
    <!-- Bootstrap JS -->
    <script src="https://maxcdn.bootstrapcdn.com/bootstrap/3.3.6/js/bootstrap.min.js"></script>
    <!-- Typeahead.js Bundle -->
    <script src="https://cdnjs.cloudflare.com/ajax/libs/typeahead.js/0.11.1/typeahead.bundle.min.js"></script>
    <!-- Typeahead Initialization -->
    <script>
        jQuery(document).ready(function($) {
            // Set the Options for "Bloodhound" suggestion engine
            var engine = new Bloodhound({
                remote: {
                    url: '/find?q=%QUERY%',
                    wildcard: '%QUERY%'
                },
                datumTokenizer: Bloodhound.tokenizers.whitespace('q'),
                queryTokenizer: Bloodhound.tokenizers.whitespace
            });

            $(".search-input").typeahead({
                hint: true,
                highlight: true,
                minLength: 1
            }, {
                source: engine.ttAdapter(),

                // This will be appended to "tt-dataset-" to form the class name of the suggestion menu.
                name: 'usersList',

                // the key from the array we want to display (name,id,email,etc...)
                templates: {
                    empty: [
                        '<div class="list-group search-results-dropdown"><div class="list-group-item">Nothing found.</div></div>'
                    ],
                    header: [
                        '<div class="list-group search-results-dropdown">'
                    ],
                    suggestion: function (data) {
                        return '<a href="' + data.profile.username + '" class="list-group-item">' + data.name + ' - @' + data.profile.username + '</a>'
              }
                }
            });
        });
    </script>
  </body>
</html>
# Conclusion
In this tutorial, we have implemented smart search using Laravel and Typeahead. Thanks to the awesome library: Typeahead, and the awesome framework: Laravel, for making this all a lot easier.


Be the first one to write a response :(
{{ reply.member.name }} - {{ reply.created_at_human_readable }}